
Who would have thought eggs, plates, and salt were once key to photography? And, no, we don’t mean as your photographer’s breakfast! With how simple, fast, and accessible digital photography is today, it can be hard to comprehend how involved and, frankly, peculiar photographic processes once were. Let’s talk about just a handful of those processes as we celebrate National Photography Month!

The first permanent photograph was developed in 1824 by the wealthy inventor Joseph Nicéphore Niépce, who discovered that various chemicals darken when exposed to light. Using a darkened box with a hole in it known as a camera obscura, Niépce exposed a pewter plate coated in bitumen (a naturally occurring asphalt) to sunlight. The result? A faint image developed onto the plate. The process is believed to have taken several days!
A growing understanding of science coupled with the unveiling of Niépce’s first photograph allowed photographers to innovate numerous new developmental methods in subsequent decades. The sheer number of these processes is too vast to describe in just one blog post. For that reason, this post will focus on the most commercially successful photography processes of the 19th century, with an explanation of the photograph’s composition and some examples from the ADAH’s collection. Please see the links at the end of this post for references to provide information on other types of 19th-century photographs and more recent photography.
Photographs are generally made of three primary layers
- a base layer like glass or paper
- a binder layer such as gelatin
- an image material layer which is most often silver
Some photographs may have only two layers, while others will have more layers beyond the primary three. Additional layers may include chemical coatings meant to make an image clearer or stop the curling in the case of a paper base layer.
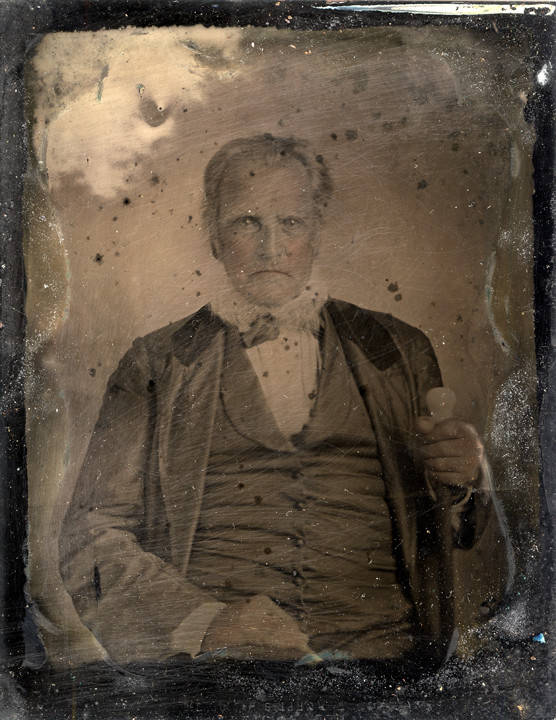
Daguerreotypes 1839-1860s
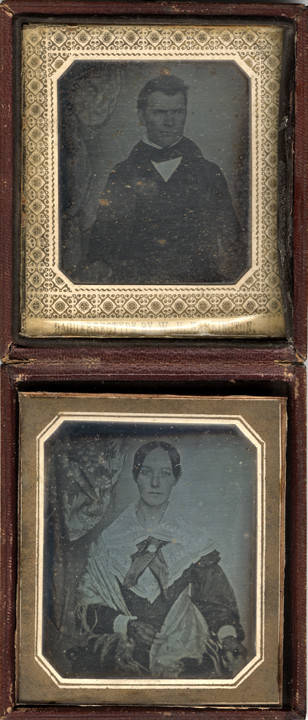
• Base Layer: Copper Plate
• Binder Layer: None
• Image Material Layer: Silver

Louis-Jacques-Mandé Daguerre worked to perfect his photography process for over a decade, even partnering with Niépce. Following Niépce's death in 1833, Daguerre continued to work on his photographic process, convinced that using silver instead of bitumen would create a crisper photographic image. He called the resulting photographs daguerreotypes.

In 1839, Daguerre published the 19th century equivalent of a how-to manual for his newly perfected method of photography. This publication led to the widespread commercial success of daguerreotype photography, which remained the most popular form of photography until the late 1850s.
The base layer of a daguerreotype is a copper plate. Daguerre coated the plate with an image material layer of silver and iodine. Once exposed in a camera obscura, the plate formed a direct image. Daguerre fully developed the image by applying mercury fumes to the plate. The image was ready to be “fixed” in less than thirty minutes after the fuming. Fixing consisted of bathing the plate in a saltwater bath. The bath kept the image from disappearing, an issue with Niepce’s photographs. However, Daguerreotypes still remained sensitive to too much light, and protective cases were necessary to keep the photo from fading.
Daguerreotypes do not include a binder layer. However, photographers often “gilded” their daguerreotypes. Applying a gold chloride solution increased an image’s crispness, but also had the positive side effect of helping the copper plate resist tarnishing and hardening the silver particles.
Daguerreotypes are one of the more simple photograph formats to identify. The surface of a daguerreotype has a mirror-like shine and, if looked at from different angles will appear to be negative and positive at the same time. A negative image presents the dark portions of a photograph as light and the brighter portions as dark. See the image at the beginning of this blog for an example of a negative image. As seen above, daguerreotypes are often placed in a brass preserver frame and then housed in a wood and glass case to protect the image.

Calotype Paper Negatives and the Salt Paper Print Process 1840s-1860s

• Base Layer: Paper
• Binder Layer: None
• Image Material Layer: Silver
A considerable downside of daguerreotypes was that the process produced a positive, one-of-a-kind image. A more lucrative and commercially viable setup would be for photographers to take negative photographs and create several positive prints. William Henry Fox Talbot had been creating photographic images since the 1830s and patented a process of making paper negatives known as Calotypes in 1841. From his calotypes, he engineered a system of creating positive prints using contact printing. The prints created from Talbot’s process became known as salt prints or salted paper prints.
Talbot’s system required soaking the base layer, a piece of writing paper, in a salt solution before coating the paper with the image material layer, silver nitrate. The nitrate and salt combined to create a light-sensitive reaction. Once the paper was dry, Talbot pressed the prepared writing paper against the paper negative and held these together using a sheet of glass. The pressed papers were then exposed to sunlight.
Salt paper prints are not as clear as daguerreotypes due to the fibrous nature of paper. Without a binder layer, the image material layer was printed directly into the paper base layer, and the paper fibers are quite visible. A salt paper print will be matte rather than glossy. You can find salt paper prints loose, framed, and in cases similar to daguerreotype cases.
Wet Glass Plate Negatives 1851-1880s

• Base Layer: Glass
• Binder Layer: Collodion
• Image Material Layer: Silver
In 1851 Frederick Scott Archer melded the crispness of a daguerreotype and the ease of reproduction of a calotype when he introduced the wet glass plate negative.
Archer used a base layer of thin glass and a syrup-like cellulose nitrate solution known as collodion for the binder layer. After coating the glass in collodion, it was submerged in the image material layer of silver nitrate, causing a light-sensitive reaction. The exposure process for a wet glass plate negative took only seconds – much faster than previous photographic exposure times. The trade off? After exposure and before the chemicals dried, the plate needed to be processed in a darkroom almost immediately.
Despite the need for quick action on the part of the photographer to produce a wet glass plate negative, this process soon replaced the daguerreotype and the calotype processes. Photographers created mobile darkrooms in wagons and traveled the United States. The glass plate negative process was popular for portrait photography, but the shorter exposure time meant that photographs of events like parades could also be captured. The portable darkrooms also enabled photography during the American Civil War. Wet plate negatives became the primary source of negatives used for wartime positives.
Albumen Prints 1850-1895
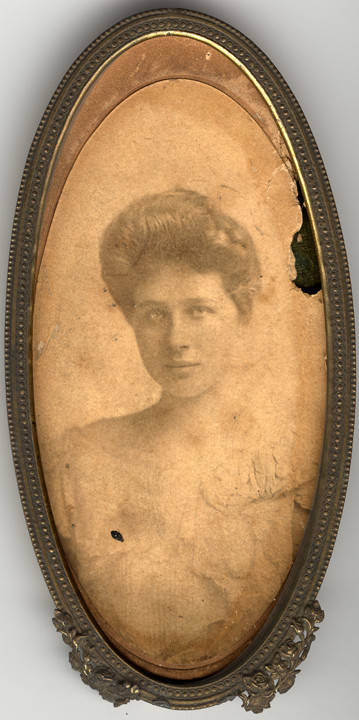
• Base Layer: Paper
• Binder Layer: Albumen (egg white) and salt
• Image Material Layer: Silver
Photographer Louis-Desire Blanquard-Evrard unveiled a new type of print process in the late 1840s, utilizing egg white and salt instead of the salt chemical concoction used by Talbot. This process became the most popular form of printed photographs for the remainder of the 19th century and could be used with several different formats of negatives but was especially popular with wet glass plate negatives. Albumen prints produced a better version of the image than salt paper printing, and the materials needed for the process were also less expensive.
A paper base layer was coated with a binder layer of albumen (egg white) to create a smooth surface that hid the paper fibers better than a salt paper print. The image material layer of silver nitrate was then applied, forming light-sensitive salts just as with the salt paper printing process. The coated paper was then placed in contact with a negative and exposed to sunlight to produce a positive image on the paper. Photographers could create several prints from one negative in a single day. After the photo had dried, photographers commonly toned, or hand colored the printed images.
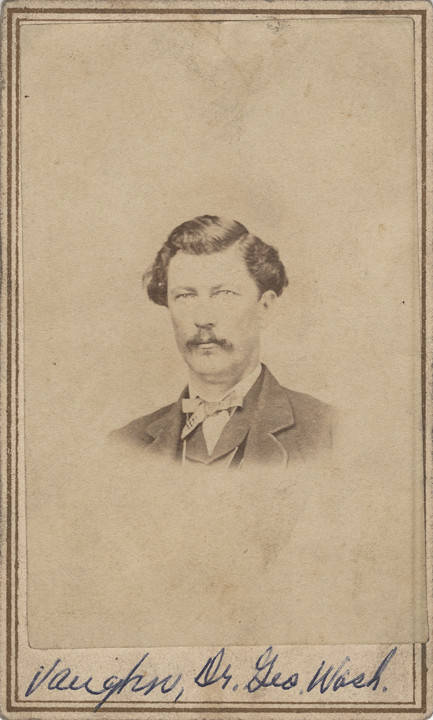
In contrast to salt paper prints, albumen prints will have a semi-glossy to glossy finish. Albumen print photographs are often mounted on cardstock, such as for stereographs or carte-de-visite. Carte-de-visite or “calling card photographs” were especially popular in North America during the 1860s. They provided an inexpensive way for soldiers serving in the Civil War to share a photo with their sweethearts, friends, and family. In addition to the mounted photographs, framed albumen prints are common.

Albumen prints are also likely to have a yellow discoloration that looks like staining. The natural yellowing of the eggs white causes this discoloration. Cracking of the image can also be present, caused by shrinkage of albumen.
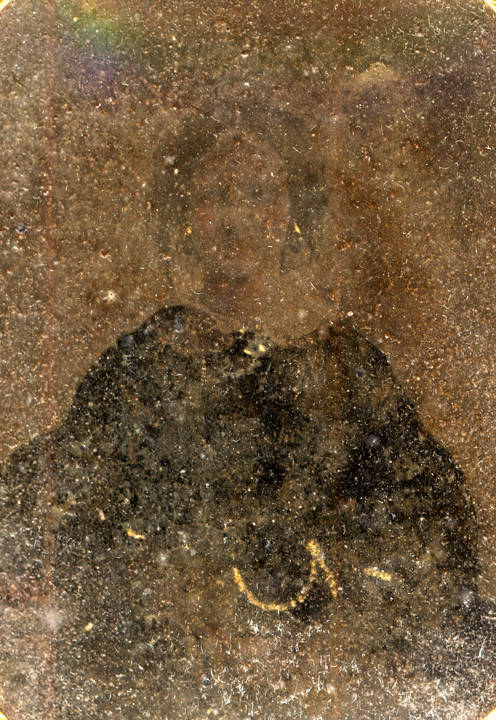
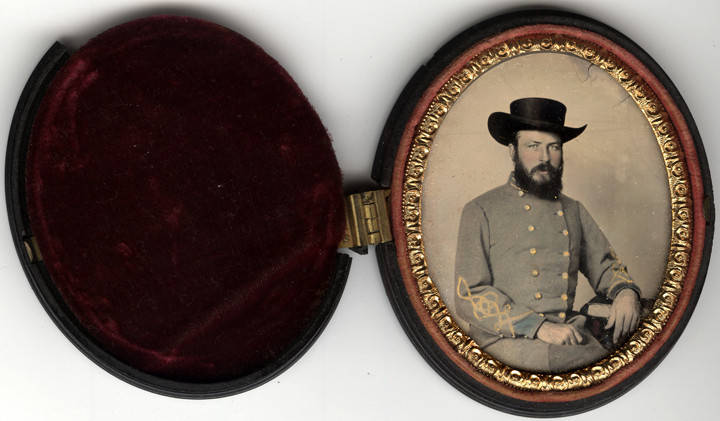
Ambrotypes 1850s-mid 1860s

• Base Layer: Glass
• Binder Layer: Collodion
• Image Material Layer: Silver
Ambrotypes developed out of merging the idea of the one-of-a-kind daguerreotype and the cost-efficiency of the wet glass plate process. James Ambrose Cutting was not the first creator of positive glass collodions, but he refined the photographs and patented “ambrotypes” in 1854.
A glass plate base layer was coated in a binder layer of collodion and bathed in the image material layer of silver nitrate, then underexposed in the camera. The result was a light gray negative image that became a positive photograph when placed on a dark background. The most popular backing method was to paint the back of the glass in a dark color, but other methods include setting fabric or metal behind the glass.
Ambrotypes were almost exclusively used for portrait photography. Photographers also often hand-painted the images after processing, adding color to the lips and cheeks of the subject and adding gold to jewelry and buttons.

Ambrotypes can be distinguished from a general glass plate negative by their fainter image and the dark paint, fabric, or metal on the back of the glass. This is easy to see if the ambrotype is loose; however, ambrotypes were most often placed in protective cases very similar to daguerreotypes. Ambrotypes do not have the mirror-like reflection of a daguerreotype.
Damage and deterioration may also help you in identifying an ambrotype. Shattering or cracking of the glass base layer distinguishes the ambrotype from a daguerreotype. The dark back paint layer may also deteriorate, making the photo appear to be flaking or causing dark spots in the image.
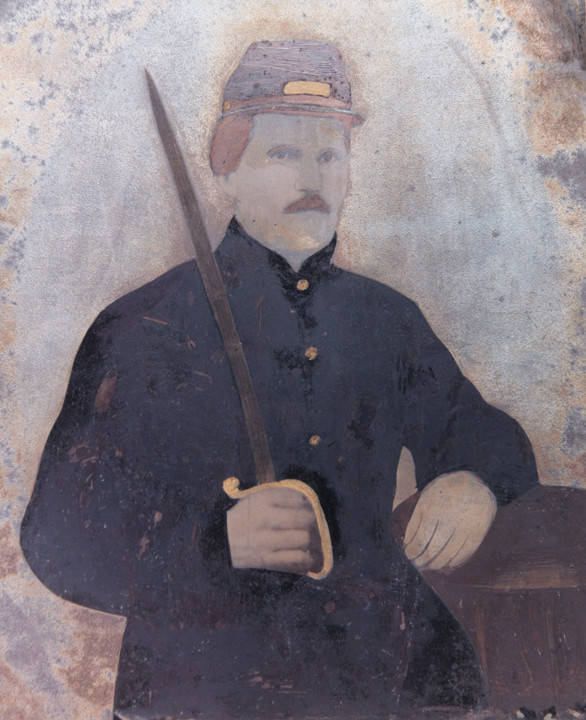
Tintypes 1849-1960s
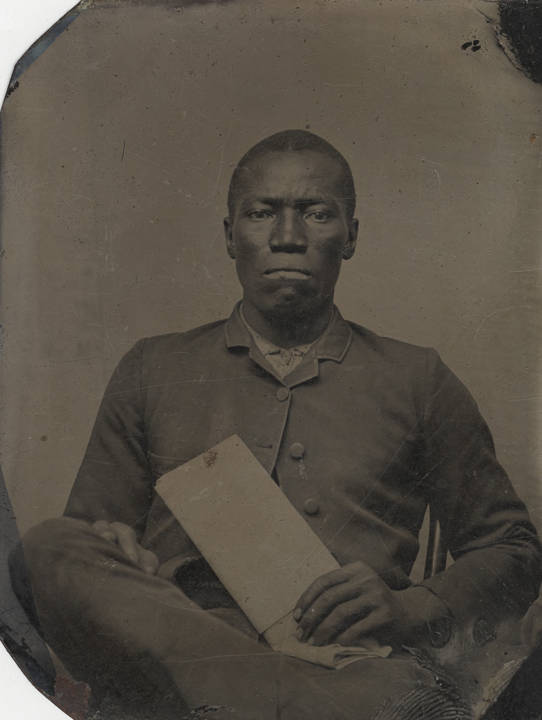
• Base Layer: Metal (usually iron)
• Binder Layer: Collodion
• Image Material Layer: Silver
The less expensive successor to the ambrotype was the ferrotype, a direct positive photograph on a metal plate. Ferrotypes became known as “tintypes” due to the tin-like feel of the metal base.
The metal base layer was usually an iron plate, coated with a binder layer of collodion and an image material layer of silver nitrate. The exposure process took several seconds to a few minutes, and the resulting photograph was a sharp image despite a low color contrast. Because the iron plates were inexpensive and the process quick, tintypes were popular at fairs and held the stigma of being “lower class” photographs.
Despite being regarded as “lower class” by some, tintypes became extremely popular for soldiers of all socioeconomic backgrounds during the civil war. Tintypes were far more durable than paper prints and far less fragile and heavy than an ambrotype. Soldiers carried them in their pockets without fear of them ripping, breaking, or getting wet.
Like with the ambrotype process, photographers would often hand color tintype portraits, adding a hint of color to cheeks, bright hues to clothing, and gold to buttons and jewelry.
Tintypes were usually placed in heavy paper frames when they were sold, but few of these frames stood the test of time. It is not uncommon for tintypes to have been placed in cases similar to an ambrotype. In these cases, it may not be easy to distinguish one type of photo from the other. A magnet will stick to the back of the tintype as they are magnetic, but if the ambrotype has a metal backing, it will also be magnetic. Weight might give you a clue if the case is not particularly heavy. Tintypes are much more lightweight than glass ambrotypes.
Despite their apparent durability during the Civil War, the passage of time has led to several deterioration issues. Tintypes can be dented, scratched, and even bent. Rust and oxidation are omnipresent, especially in a humid climate like the one we typically enjoy in Alabama.
Lantern Slides 1849-1960s

• Base Layer: Glass
• Binder Layer: Albumen, Collodion, Gelatin
• Image Material Layer: Silver
The original glass lantern slides were hand-painted with various illustrations and placed in an image projector known as a magic lantern. Watch the History of the Magic Lantern video from the Henry Ford Museum for more information on the projector. Entertainers used the slides to tell stories and create a sense of wonder in their audiences.
Photography expanded the use of lantern slides from entertainment to education. Manufacturers of the slides began collecting negatives of landscapes and events and produced boxed sets of the lantern slides. These boxed sets became a popular teaching tool in universities and science labs through the 1930s. Glass lantern slides were produced as late as the 1960s.

The color tone of lantern slides can vary based on the binder layer used. Albumen provided orange to green-toned slides. Collodion produced warm brown slides, and gelatin created the most commonly found, gray-black slides.
Lantern slides are easily distinguishable from glass plate negatives in that they are positive rather than negative images. Another distinction is size—lantern slides were most commonly produced on 4″x3.25″ pieces of glass.
Dry Glass Plate Negatives 1871-1920s
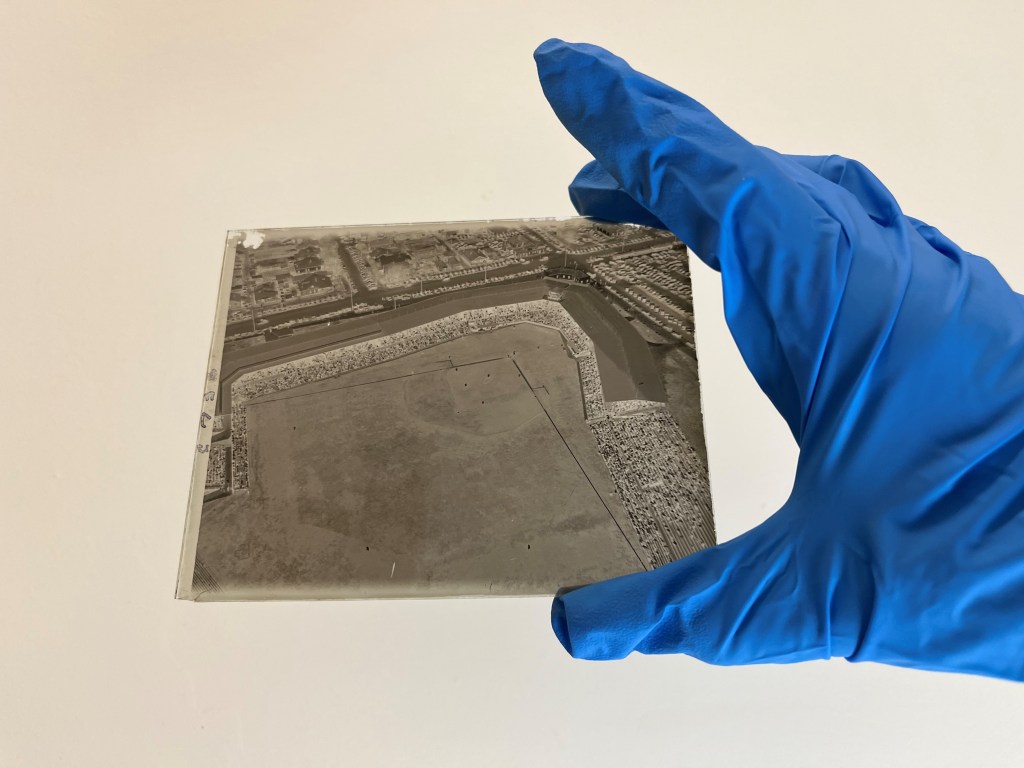
• Base Layer: Glass
• Binder Layer: Gelatin
• Image Material Layer: Silver
Introducing gelatin into the glass plate negative process ushered in the modern commercial photography supply industry. Richard L Maddox introduced the first dry glass negative in 1871 after experimenting with ways to lengthen the time photographers had to develop an image – recall that wet glass plate negatives had to be developed within minutes of their exposure! The dry glass plate process was not perfected until the late 1870s.
A glass base layer was coated with a binder layer of gelatin, and salt and silver bromides were applied as the image material layer. After the image material layer was applied, the plate was allowed to dry. Unlike collodion, the gelatin remained sensitive to light for months, meaning that photographers no longer had to rush to prepare a plate and then take and finish a photo in a few minutes. Instead, they could prepare the plates in advance and finish processing the photograph when it was convenient to do so. Portable darkrooms were no longer necessary.
The shelf stability of dry glass plate negatives created a market for mass-produced glass plates. Factories with machines cut precisely sized plates that were coated in gelatin and allowed to dry, then boxed for sale. The commercial success of the dry glass plate negatives also put photography into the hands of more people than ever before, creating an entire generation of amateur photographers.
Thanks to the manufactured nature of dry glass plate negatives, it can be simple to tell the difference between dry and wet plates. Dry glass plate negatives are thinner than wet plate negatives, and the emulsion is generally more sparsely and evenly applied. A dry glass plate negative will often have an edge around the developed photograph.
What began as a hobby for wealthy scientists and artists in the 1820s had become a full-fledged commercial industry by the end of the 19th century and would lead to the nitrate, acetate, and polyester film technologies of the twentieth century.
Storage and Handling
Each type of photograph we discussed in this blog has its own preservation issues, but a few storage and handling tips should be applied to all photos.
Photographs are sensitive to light and humidity and will fade or succumb to other deterioration when exposed for too long. Store photographs in a dark location, off the floor, away from exterior walls, and in an area that has some humidity control.
Heat will also damage these photographs, so store them in an area that is kept below 75° Fahrenheit. At a minimum, avoid storage areas that often have extreme temperature fluctuations, like an attic.
A final preservation tip is to avoid touching the image when handling. Even freshly washed hands have oils that transfer to any object you hold or touch. The oil residue will cause damage. Wear nitrile gloves when handling the photographs. Never touch the image and hold the photograph by the edges.

Photo: Michel Jarmoluk. Pixabay.
Despite the ubiquity of digital photographs in the 21st century, it is important to appreciate that the history of photography is rich with analog materials. We can still find physical photographs everywhere, including those from the 19th century. Whether in a family album, hanging on a wall, or in the collections of archives like the Alabama Department of Archives and History (ADAH), physical photographs are still very much a part of our world, our identities, and our history. With any luck, this blog has helped equip you to better appreciate the iconoclastic breakthroughs of these early printing techniques.
ADAH Records Management Archivist, Hannah Marshall Bawden wrote this blog with contributions from Records Management Archivist, Charles Busby.
References and Resources
The American Museum of Photography. “A Brief History of Carte De Visite” Accessed May 9, 2022. https://www.photographymuseum.com/histsw.htm
Crawford, William. The Keepers of Light- A History & Working Guide to Early Photographic Processes. Accessed March 23, 2022. https://archive.org/details/aa147-TheKeepersOfLight
The Daguerreian Society
https://www.daguerreiansociety.org/
Fleury, Simon. “Positive Negative” Victoria and Albert Museum Conservation Journal, Spring 2012 Issue 60. http://www.vam.ac.uk/content/journals/conservation-journal/spring-2012-issue-60/positive-negative/
The George Eastman Museum. Photographic Processes Series Accessed March 24, 2022. https://www.youtube.com/playlist?list=PLH_FfjHEuvR5U0Ur8rB35fezQ1yZkShMk
Gawain Weaver Art Conservation. “Photographic Processes” Accessed March 23, 2022.
https://gawainweaver.com/processID
Harding, Colin. “How to Spot a Ferrotype, also known as a Tintype.” The National Science and Media Museum, May 2013. https://blog.scienceandmediamuseum.org.uk/find-out-when-a-photo-was-taken-identify-ferrotype-tintype/
Harding, Colin. “How to Spot a Collodion Positive also known as an Ambrotype.” The National Science and Media Museum, April 2013. https://blog.scienceandmediamuseum.org.uk/find-out-when-a-photo-was-taken-identify-collodion-positive-ambrotype/
The Historic New Orleans Collection. “From Daguerreotype to Digital” Accessed April 3, 2022. https://www.hnoc.org/virtual/from_daguerreotype_to_digital
Image Permanence Institute. “Graphic Atlas” http://www.graphicsatlas.org/
Lavedrine, Bertand. A Guide to the Preventive Conservation of Photograph Collections. Getty Publications. https://www.getty.edu/publications/virtuallibrary/9780892367016.html
The Library of Congress. “The Daguerreotype Medium” Accessed February 12, 2022. https://www.loc.gov/collections/daguerreotypes/articles-and-essays/the-daguerreotype-medium/
McNamara, Robert. Wet Plate Collodion Photography. Civil War Era Photography Was Complicated but Could Yield Remarkable Results.” ThoughtCo, August 2018. https://www.thoughtco.com/wet-plate-collodion-photography-1773356#:~:text=The%20wet%20plate%20collodion%20process,was%20a%20fairly%20complicated%20procedure.
National Archives and Records Administration, The Unwritten Record. “19th Century Photographic Processes and Formats.” Accessed April 3, 2022. https://unwritten-record.blogs.archives.gov/2020/05/14/19th-century-photographic-processes-and-formats/\
National Archives and Records Administration, The Unwritten Record. “Visual Cues and Clues” blog series. Accessed April 3, 2022. https://unwritten-record.blogs.archives.gov/?s=%22Visual+Cues%22
Newhall, Beaumont. The History of Photography 1839 to the Present. The Museum of Modern Art. 2010.
The Nicéphore Niépce House. “Niépce and the Invention of Photography” Accessed May 10, 2022. https://photo-museum.org/niepce-invention-photography/#:~:text=The%20first%20world%20negative%20(non,a%20view%20from%20a%20window%20.
Northeast Document Conservation Center. “Photographs” Accessed March 23, 2022. https://www.nedcc.org/free-resources/preservation-leaflets/5.-photographs/5.2-types-of-photographs
Oregon State University. “Early Photographic Formats in the Special Collections and Archives Research Center. Accessed April 15, 2022. https://guides.library.oregonstate.edu/earlyphotoformats/home
South Street Seaport Museum. Martina Caruso. “Hidden Gems: Glass Plate Negatives” Accessed March 23, 2022. https://southstreetseaportmuseum.org/hidden-gems-glass-plate-negatives/
Stulik, Dusan and Art Kaplan. The Atlas of Analytical Signatures of Photographic Processes. The Getty Conservation Institutive 2013. https://www.getty.edu/conservation/publications_resources/pdf_publications/atlas.html
University of Illinois at Urbana-Champaign. Preservation Self-Assessment Program Collection ID Guide. Accessed May 10,2022. https://psap.library.illinois.edu/collection-id-guide
University of Calgary Archives and Special Collections. “Historical Photographs and their Processes” Accessed May 10, 2022. https://asc.ucalgary.ca/photohistory/
Western Illinois Museum. “Tintypes” Accessed May 6, 2022. http://www.wimuseum.org/tintypes/
