
Have you been put in charge of your office or agency’s records and, by extension, the records storage room? This can be an overwhelming experience. You may inherit a space with unmarked boxes, loose materials, ephemera, and decades of records crammed into a tiny space and packed to the ceiling. You’ll need to gain control of your storage room to carry out your records management duties.
Today’s blog offers ten steps to help your records storage room clean-up projects. While we outline best practices for organizing a storage room, we recognize that your situation is unique and offer tips on working with the resources you have. Please don’t hesitate to contact us with any questions as you tackle your storage room organization.
1. Schedule Time to Organize & Don’t Go it Alone
Our first tip, and arguably the most important in ensuring the success of your storage room, is to acknowledge that the process can be time-consuming and commit to the project. Working in your records storage room can entail physically moving items like boxes and shelves, sorting through records, and cleaning. It can be easy to put off organizing your records storage room when you have so many other tasks, and after all, it will still be there tomorrow, right? Try to avoid this mindset; records not stored in a secure records room are more likely to be misplaced or damaged.
Dedicating even small amounts of time can carve a monolithic project into manageable pieces, so we recommend you block off a regular time to commit to the project. For example, you could schedule every other Thursday afternoon to work on the storage room. Put this event on your calendar and stick to it. Making it official in this way helps transition the project from a nagging “I need to do that” to a confident, “I work on the records room from 2:30-5:00 every other Thursday.” If you have Outlook or Gmail, you can easily share your calendar with coworkers, so they will know you are working in the storage room at that time.
Ideally, do not undertake the project by yourself. If your agency can do so, designate someone to work part-time in the records storage room to speed up the process. Enlisting the help of other staff members is also a good plan. More staff working will speed up the organization and invest others in the project.
2. Separate Records from General Storage Items
Holiday decorations, unused or broken furniture, and excess office supplies do not belong in the records or file storage room. You should move all obvious non-records out of the storage room at the start of your organization project.
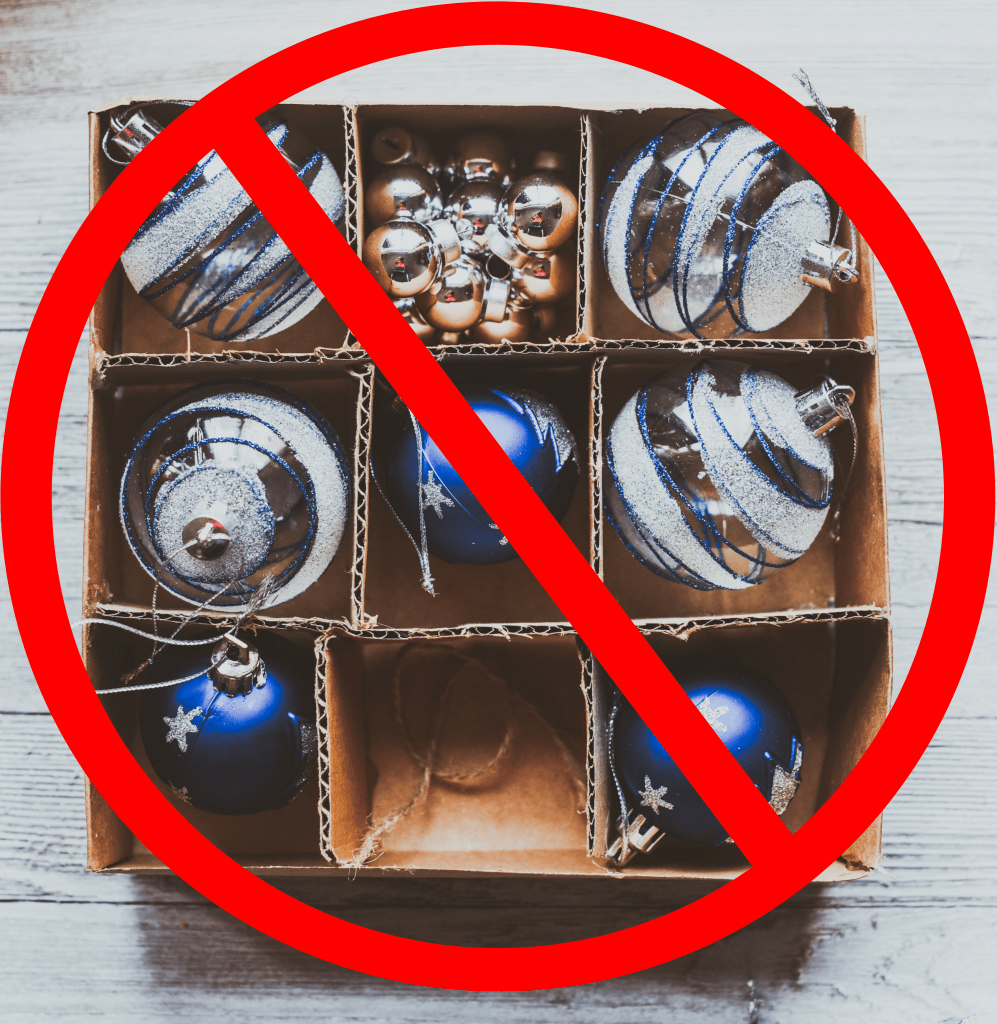
If starting from scratch with your storage room, make sure that these sorts of non-records don’t even cross the threshold! It’s best if non-records have their own storage room. Many of you may be thinking, “There is no way that will work. Our office doesn’t have the space for two storage areas.” We understand that reality. When you cannot devote a whole room just to records, you MUST still create a clear separation between records and non-records. If at all possible, designate specific shelves, tables, or areas for records and others for non-records. Ensure that everyone who has access to the room understands the designations.
3. Lock the Door and Throw Away (some of) the Keys
This step in gaining control of your records or file room is one that you must start during the clean-up process and continue in perpetuity. Locking the storage room can help your office avoid misplaced, lost, or stolen records. In addition, since the temptation to shove things in a storage room is substantial, locking the doors prevents people from dumping unidentified items (both records and non-records) there.
Designate a few employees who will be permitted access to the room and provide them with keys. Designated staff members should also be trained in procedures for checking records out and adding records to the storage room. Both processes are discussed later in this blog.
4. Survey (Inventory) Records and Label Shelves
To gain complete control of your storage room, you must figure out what records you have. You may need to open boxes and view what is inside, but with any luck, some of the boxes have labels that will help you identify the following:
- Who Created the Record (Department/Section)
- Record Type
- Description of the Record’s Content
- Date or Date Span
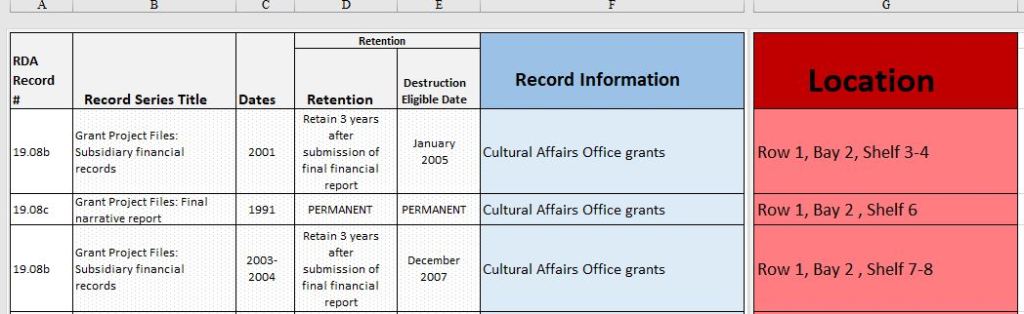
You’ll need to create some form of an inventory that, at a minimum, tells you what the records are and the box’s location in the records storage room. An index can be maintained in various formats, including on paper, an Excel spreadsheet, or a database program.
If you choose to keep the inventory on paper, it needs to be sortable to identify what you are looking for more easily.
Now is an excellent time to think about designating locations on your shelving. Alpha-numeric or numeric systems to identify rows, bays, and individual shelves is a popular method for specifying locations. (Please see the references and resources section at the end of this blog for documents that provide more information on shelving considerations and labeling systems.)

Once you have determined how shelving will be designated you must figure out how you will label your shelves. Some options include taping labels to the end of shelves or magnetic label holders. If using tape for the shelf labels, you may need to replace the tape periodically to avoid the labels falling off. Once labeling is complete the location information should be added to the inventory to make finding records more accessible in the future.
5. Identify the Records Categories
After surveying the records, you should determine how long the records must be kept utilizing the appropriate Records Disposition Authority (RDA). In Alabama, both state and local entities can find their RDA on the Records Management page of the Alabama Department of Archives and History’s website.
You will find that the records in your storage room fall into three categories:
- Permanent: Must be retained in perpetuity. (State agencies may be able to transfer these records to the ADAH)
- Temporary: Records that must be maintained for a specified period as outlined in your relevant RDA.
- Temporary and already Eligible for Destruction: Records that have fulfilled their retention period. You can begin the destruction process for these records.
6. Destroy Eligible Records
Before determining next steps, you should manage the records already eligible for destruction. You do not want to unnecessarily invest time and energy into sorting and storing records if they are eligible for destruction. In addition, if you are paying for off-site storage, it does not make economic sense to pay to keep records that you can legally destroy.
The process of destroying government records in Alabama differs between local and state government entities, but both need to keep complete documentation of records destruction.
If you are a local entity, you must submit destruction notices to the ADAH Records Management Section BEFORE you throw away, shred, or otherwise dispose of eligible temporary records. Learn more about the local destruction process in this blog post: Local Government Records Destruction 101.
State agencies must use an approved RDA and document the destruction of both paper and electronic records and submit this documentation to the ADAH Records Management Section each year as part of their Annual Records Disposition Implementation Report. Learn more about the state agency destruction process in this blog post: State Agency Records Destruction 101.
The destruction of obsolete temporary records should be irreversible. In particular, sensitive paper records should be incinerated, shredded, or otherwise destroyed so that the records are unreadable. Examples of sensitive materials include those with personally identifiable information such as Social Security numbers and medical records or consumer information like credit card or bank account numbers.
There are several ways to destroy records, but shredding is often the most secure and efficient. If you are tackling less than five cubic feet of records that may be destroyed, you may consider shredding in-house if you or other employees have time to dedicate to this task. Any shredder purchased for this purpose should be capable of cross-cut shredding.

If several cubic feet are eligible for destruction, scheduling a shredding company to handle the destruction of your records is probably a better option. Shredding companies often can be scheduled for a one-time purge of records, such as after cleaning out your storage room, but they can also be regularly scheduled on a weekly, monthly, or even annual basis. You may wish to reach out to other departments, agencies, or offices to see if they would like to share the costs of scheduling a communal shredding truck.
7. Box and Label your Records
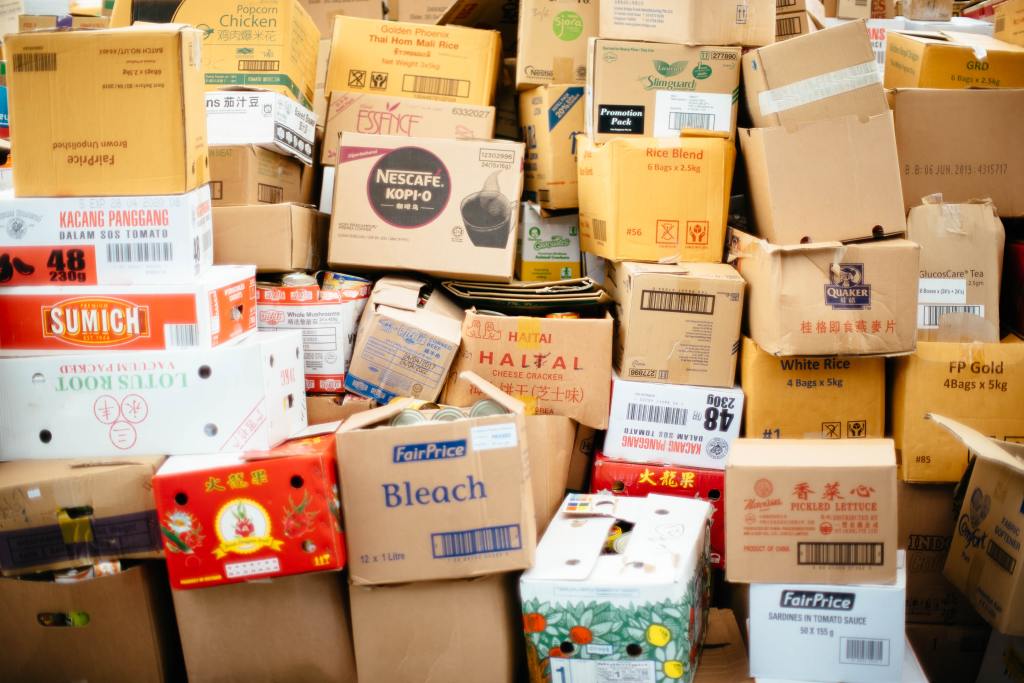
Boxing records provides better protection than loosely stacking them on the shelves. It will help to choose standard sized boxes that fit on your shelves. You don’t need to spend your funds on archival storage cartons for your records, but you should ensure that the records are not stored in contaminated boxes like those used to transport fruit or food. Printer paper boxes are a great economical option for keeping your records. Avoid double-sized banker boxes as they are heavy and a challenge to move. Also, avoid putting your records in plastic bins. Although these bins are handy and reusable, they can create microclimates that encourage mold growth.
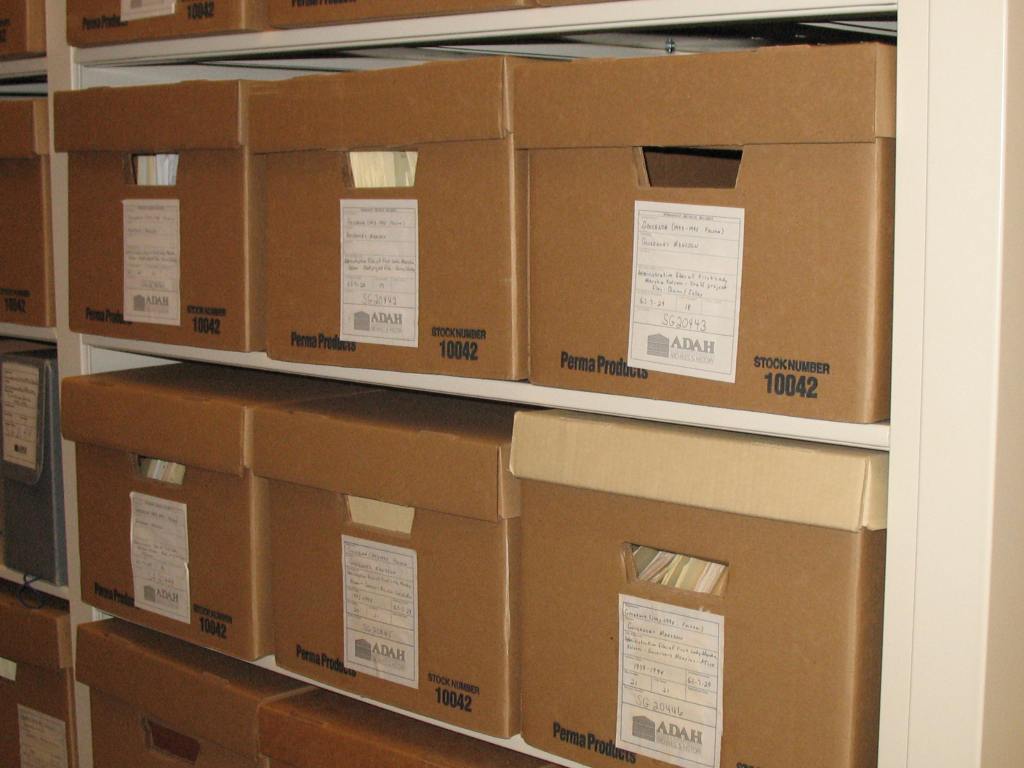
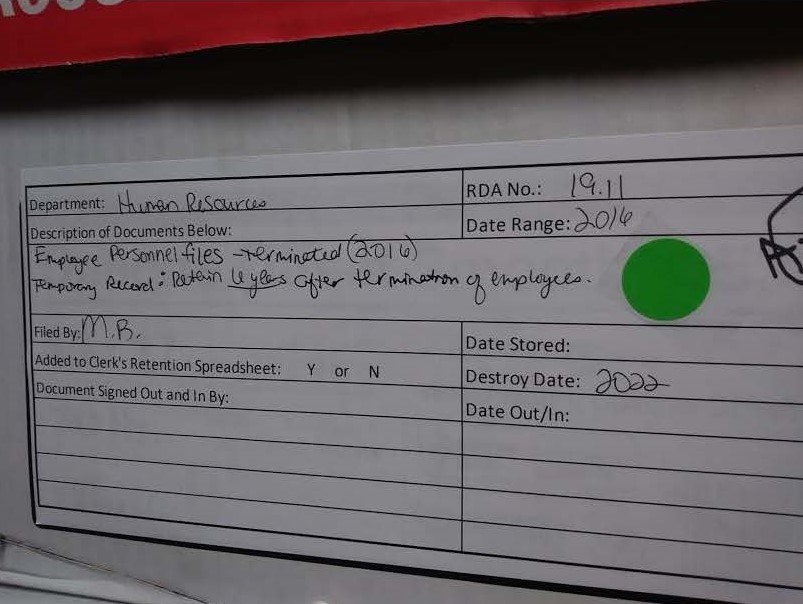
Boxes must be labeled before they are placed on shelves. The labels on your boxes should include the information you gathered during your records inventory/survey.
- Department that Created the Records
- Record Series
- Date Span
- Retention
- Destruction Date (if applicable)
After distinguishing your permanent and temporary records, determine how you will arrange them when returning the boxes to the shelves. Choose a system that works best for your agency or office’s needs and the available records storage space. If you are unable to store boxes of like records near each other that is totally fine! Having intellectual control (knowing what the records are and having the ability to locate the boxes when needed) is far more important than placing like records physically close to one another. This is why having a clear, regularly updated inventory is so important. For example, grant file records could be housed on several different shelves throughout the room but by looking at your inventory, you will be able to quickly locate all of them if needed. If your storage space does allow for a more systematic approach to storing boxes, popular organization methods include storing all records from a division together or storing all permanent records separately from temporary records.
8. Move Records Away from the Floor and Ceiling and Dim the Lights
Using shelves to store records is the preferred storage method, but you must use pallets or tables if there are no shelves. Records stored directly on the floor are in imminent danger of water damage in the case of a flood. Records stored even a few inches off the floor require far more water to collect before sustaining significant damage. Similarly, do not stack records on the very top of the shelves where a leaking pipe or sprinkler can soak them.
If you are getting new shelves for your storage room, choose metal. Wood and plastic shelves can off-gas chemicals that can damage records over time. Wood can also retain moisture, encouraging mold and mildew growth in the right conditions. If you are working with wood shelving and do not have a budget for new shelves, specific products like Marvelseal (an aluminized polyethylene and nylon barrier film) can be placed on shelves to act as a vapor and gas barrier; a low-cost alternative to these products is to line the shelves with aluminum foil.
Additionally, light can damage records, and the sunlight is especially harmful. Ideally, your storage area is a windowless room, but this isn’t always possible. If there are windows in your storage room, cover them with blinds or curtains and avoid placing records near the windows. Specialized products for windows in museums and research rooms are available but are also expensive. Since any coverage is better than none, don’t worry if you can only afford to pick up light-blocking window coverings from the store. While sunlight is terrible for records, artificial light isn’t much better. Turn the lights off in the storage room unless someone is retrieving or moving records.
9. Develop Systems for Transmitting New Records and Checking out Records
Now that you’ve gained control of the records in your storage room, you have to plan for future additions. No additional records should be added to the storage room without the employee in charge of records management knowing precisely what the records are. All relevant information should be added to the box label before the records are shelved. The records manager must also add the information into the inventory before shelving the new records.
Periodically, employees may need to access records in the storage room. In this situation, you must have a process for checking out the records. A fundamental process should include a checkout sheet that lists the person’s name, the date they took possession of the records, and the expected return date. Only the designated employees with keys to the storage room should be allowed to oversee the checkout process and should follow up with the individual after the scheduled return date if the records are not returned.
10. Regularly Check the Records Storage Room
Congratulations! You’ve cleaned, sorted, and gained control of your records storage room! That said, you can’t just ignore the storage room. It is best practice to check your storage room at least weekly to ascertain if there are any facility problems. Water leaks, bug infestations, or mold outbreaks are all issues that you can detect during your regular inspections and immediately work to rectify. Don’t neglect your inventory either, make sure that the inventory is kept up to date whenever anything changes, including if you must move boxes to rectify an issues you discover during your inspections.
After you follow these steps, you’ll be much more in control of your records and will have simplified your future work as a records manager. Some of the benefits you’ll experience from having a well-organized and maintained records storage room include mitigating the chance of misplaced or lost records, quickly locating records for a records request, and the ability to dispose of eligible temporary records promptly.
The Records Management Section at the ADAH is always available to answer any questions you may have before, during, and after you wrangle your records storage room. One last thing, don’t forget to take photographs before you start your records storage room project, while you are working, and after the project is complete. Documenting your progress in this way is a great way to support your well-deserved sense of achievement!
Records Management Archivist, Hannah Marshall Bawden wrote this blog
References and Resources
ARMA International (Association of Records Managers and Administrators)
https://www.arma.org/page/Standards
ClearlyInventory. “How to Make Good Labels for Inventory Locations: A Location Without a Label is Nothing” Accessed January 14, 2022. https://clearlyinventory.com/resources/inventory-basics/how-to-make-good-labels-for-inventory-locations/
International Council on Archives Committee on Archival Buildings in Temperate Climates. “Shelving for Archival Storage-Key Issues.” 2011. https://www.ica.org/sites/default/files/CBTE_2004_toolkit_conservation_EN.pdf
National Park Service. “Conserve O Grams” Accessed January 14,2022. https://www.nps.gov/museum/publications/conserveogram/cons_toc.html
State Archives and Records Authority of New South Wales. “Shelving and packaging (Solutions for Storage)” Accessed January 14, 2022. https://www.records.nsw.gov.au/recordkeeping/advice/solutions-for-storage/5-shelving-and-packaging
Rieger, Morris. “Packing, Labeling and Shelving at the National Archives.” American Archivist 25, no 4, October 1962. https://doi.org/10.17723/aarc.25.4.1158q96681r03001
Roper, Michael. Managing Public Sector Records A Study Programme. Managing Archives: A Procedures Manual. United Kingdom: International Council on Archives and International Records Management Trust, 1999. https://www.irmt.org/documents/educ_training/public_sector_rec/IRMT_archive_proc.pdf
Office of the Secretary of State Washington State Archives. “Organizing and Inventorying Records: Selecting Appropriate Shelving for Records Storage.” Records Management Advice, July 2018. https://www.sos.wa.gov/_assets/archives/recordsmanagement/advice-sheet-selecting-appropriate-shelving-for-records-storage-july-2018.pdf
IMAGES
A, Anusha. Christmas baubles in a box carton. 2019. https://unsplash.com/photos/_Ddw21PpjSs
Chuttersnap. Cardboard Box Lot. 2017. https://unsplash.com/photos/fyaTq-fIlro
Islandworks. Username Passwrod. 2021. https://pixabay.com/photos/username-password-shredded-paper-5948556/
