
Did you know that you must receive authorization from the Alabama Department of Archives and History (ADAH) before you destroy local government records? If you did not know this, please visit our other blogs Managing Local Records in Alabama Resource Guide and Local Government Records Destruction 101 and then come back to this post.
If you did know this and would like to learn more about filling out a Local Government Records Destruction Notice (destruction notice), then this is the post for you! The following post provides a visual, step-by-step guide to filling out the form. The form can be filled out electronically, or if you prefer, you can print out and fill in the fields manually. Our visual guide demonstrates how to complete the form electronically.
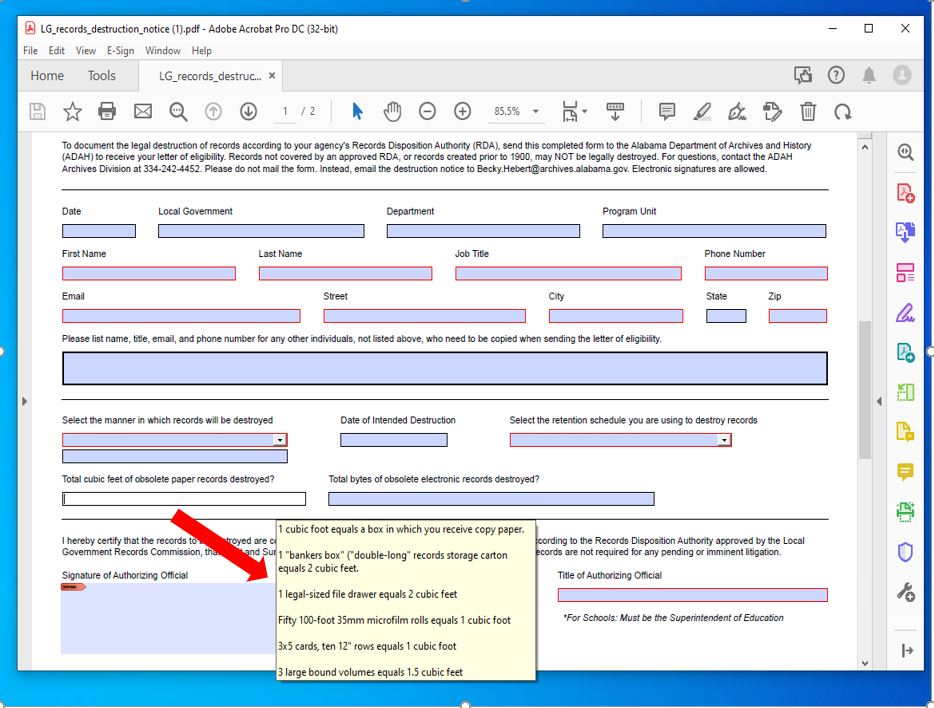
Opening the Destruction Notice in Adobe Acrobat Reader allows you to complete the form electronically and even has the added benefit of providing detailed instructions if you hover the mouse over certain fields.
The first page of the Local Government Records Destruction Notice requires some information that you will be able to fill out right away, while other boxes are best filled out after completing the second page. The following instructions detail how to fill out section one of page one.

Section one of page one is basic information about your office and the people who need to receive a copy of the eligibility letter. Make sure that you fill out these fields so that we can contact you. We will contact the first person listed if we have any questions about the destruction notice.

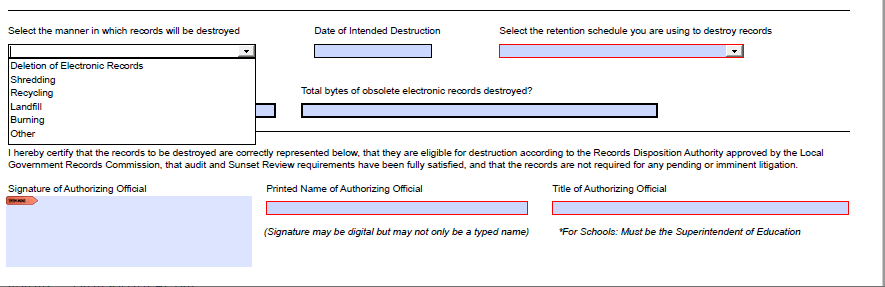
Another advantage of filling out your destruction notice on the computer is that many of the fields have a drop-down menu for you to select the appropriate response. “Select the manner in which records will be destroyed” is one such field. When deciding how you will destroy the records remember that confidential or sensitive information must be destroyed in a secure manner such as crosscut shredding or burning.
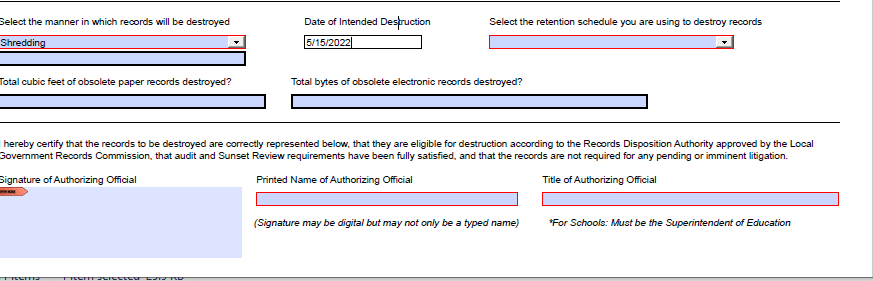
Fill in the date that your office intends to destroy the records, this may be the day that you’ve scheduled a shredder truck or burn day. If you don’t have a specific date, you can write “ASAP” or “When Approved”. With either option, you still must receive your eligibility letter before you destroy records. Processing and approving a destruction notice with no issues can take up to two weeks. Plan on submitting your notice as early as possible in case there are any issues to be addressed before you receive your eligibility letter.
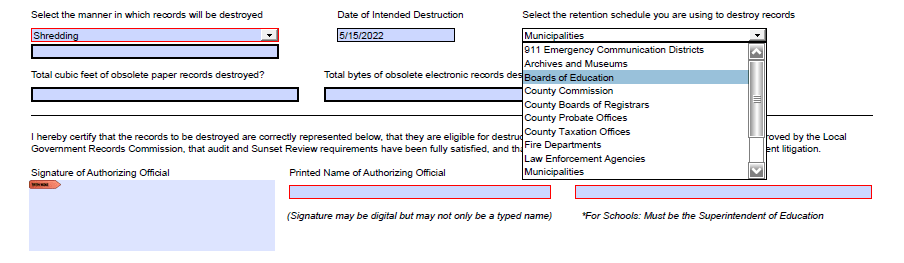
“Select the retention schedule you are using to destroy records” is another field that has a drop-down menu. Select the Records Disposition Authority (RDA) which provides your agency with legal authority to destroy records. The most up-to-date RDAs are available on the Records Management tab of the ADAH website.
You will now want to complete the second page before you finish filling out page one, section two. The total volume of records being destroyed, and signature are the last details you will add before submitting the destruction notice to the ADAH.
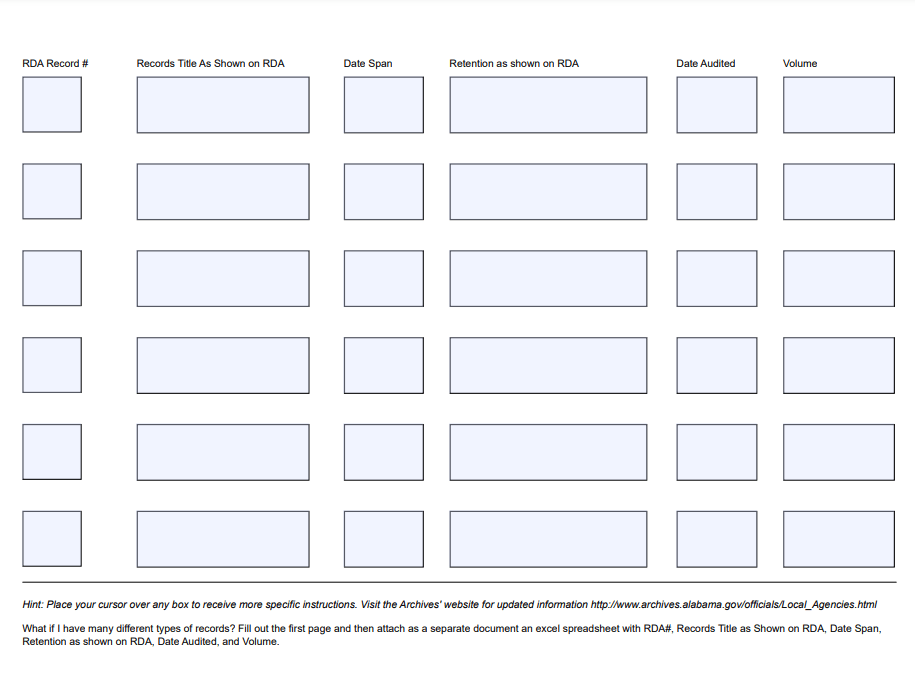
You will need to have your RDA available as you fill out the second page. For our example, we will be using the Municipalities RDA. While you may have the same records as shown in this example, the “RDA record #” and “retention as shown on RDA” may be different for your agency. Always use the appropriate and most recent RDA.
The first column on the second page of the destruction notice asks for the “RDA Record #.” We recommend that you use the digital copy of your RDA rather than a printed version, as you can easily keyword search using the keystroke combination CTRl+F or Command+F.

Using this keyword search function allows you to search for the exact record you are looking for. You may need to try different words or phrases if your first search doesn’t return what you are looking for. RDAs includes broad descriptions in order to cover as many different records as possible. If you cannot find the records you are looking for, please contact us. In our example we are looking for canceled checks, using the keyword search “checks.”
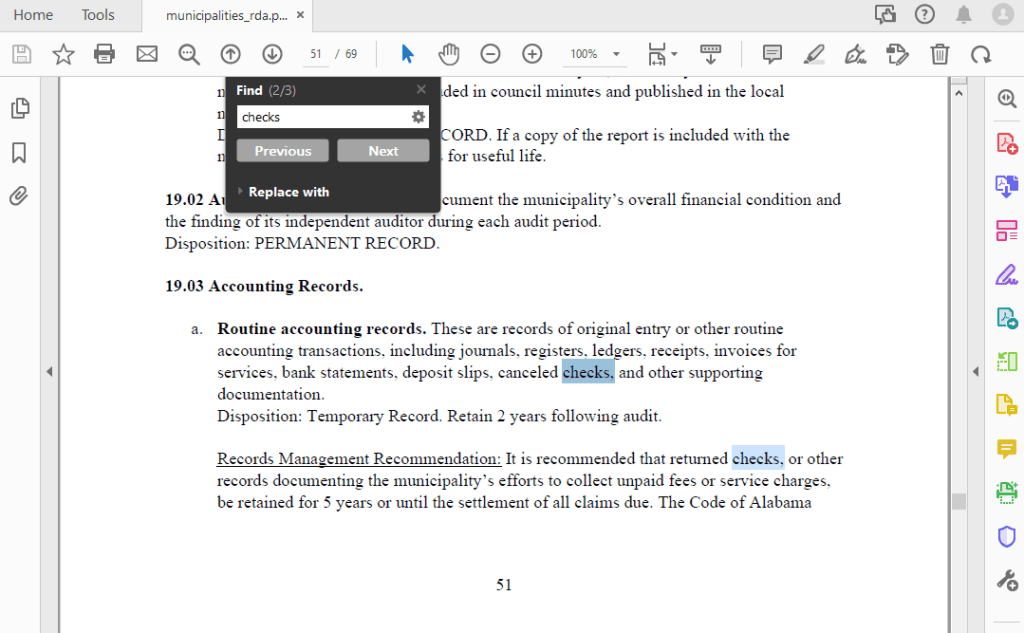
As is most often the case, there is NOT a specific series for our “canceled checks”. Instead, we see these records fall under the series Accounting Records, subseries Routine Accounting Records.
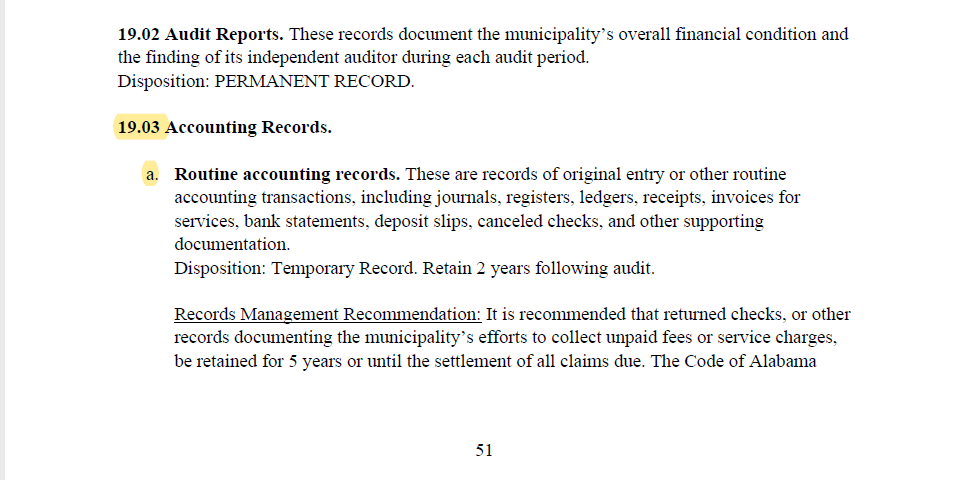
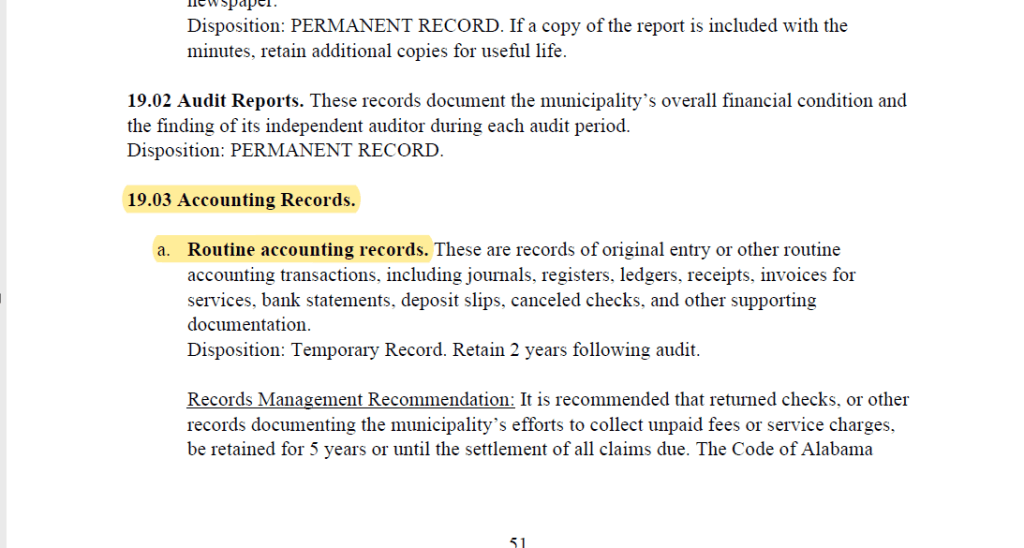
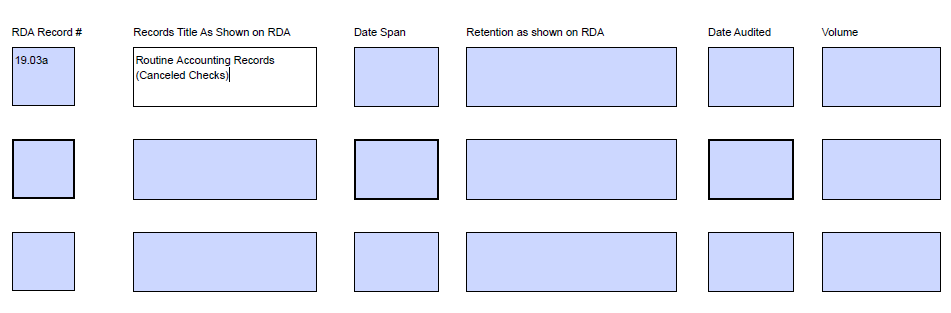
Now that we know the record series that encompasses our canceled checks, we can fill out the first box on page two “RDA Record #.” The information that must be written is highlighted in the above image of the RDA. If the records fall under a subseries like our canceled checks, make sure to include the subseries letter as shown.

The second column on page two reads “Records Title as Shown on RDA”. The records series title you are looking for will be printed in bold and should be copied EXACTLY. For our canceled checks the title is “Routine accounting records.” When filling out the form on the computer, you can easily copy from the RDA and paste the title into the form.
If you would like to add additional description of the records so that you know exactly what the records are, you can do so. The ADAH still needs to know what the records title is in order to determine the eligibility of the records so include any additional information after the records title.
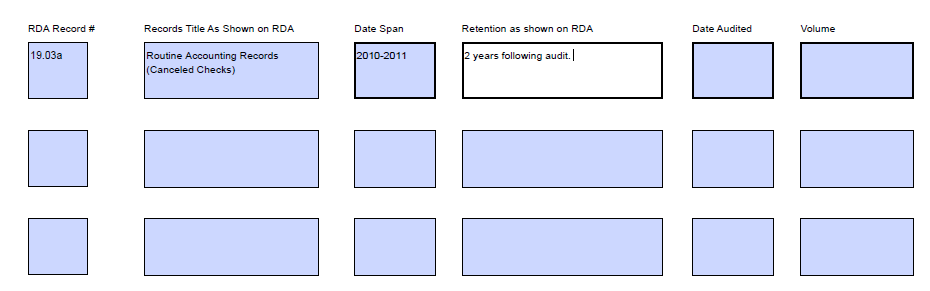
The third column is “Date Span”. This information is not found in the RDA but instead is the earliest date and latest date of the records we are requesting to destroy. For our example we have one box of canceled checks from 2010 and another from 2011. We will write “2010-2011”. If we only had records from 2010, we would just write “2010”.

For the fourth column “Retention as shown on RDA”, we will return to the RDA to copy the exact phrasing. This field often trips people up as they are looking specifically for the word “retention.” Instead, we need to look for the word “Disposition.” The disposition follows the description of the records. For our canceled checks, the retention is “Retain 2 years following audit.”

Copy and paste the retention into the field or write the retention exactly as printed in the RDA.
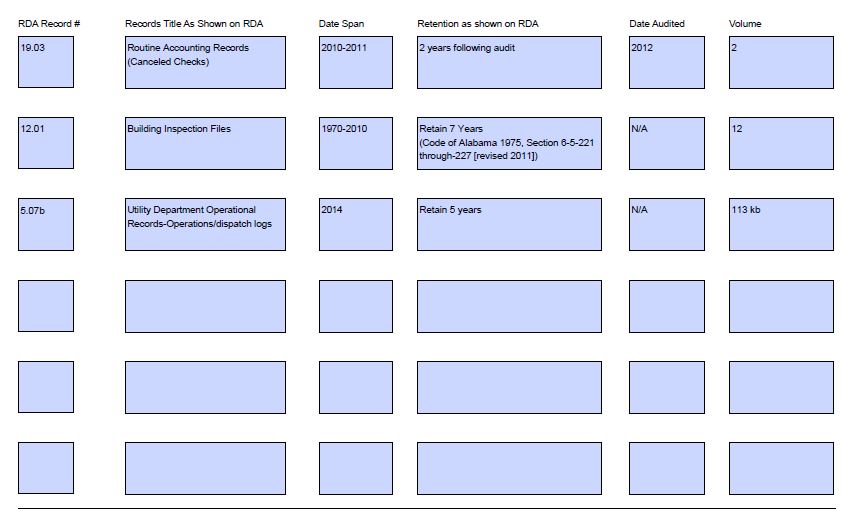
The fifth column is “Date Audited” and there are two options for filling in this field, either an audit date or “N/A” for not applicable. If the records’ retention does not mention an audit, you can put “N/A” in this field and move on to the next column. Our canceled checks’ retention period is based on an audit, so we will need to find the date of audit for the 2011 records. The exact records we are requesting to destroy do not need to have been actually pulled during the audit. The records just need to have been available for the audit.

The date audited field is one that commonly contains errors. Do not automatically list the most recent audit of your agency! This is often not the original audit of the records; moreover, listing the most recent audit instead of the original may render the records ineligible because the specified amount of time since the audit has not passed. Errors on a destruction notice will require follow up, slowing down the process of receiving an eligibility letter. If your office is subject to state audit and is unsure about when you were audited you may be able to find this information on the Alabama Department of Examiners of Public Accounts’ webpage. To learn how to avoid these sort of delays and other common errors please see our blog “Local Government Records Destruction: Avoid Common Errors.”
The sixth, and final column is “volume”. You will need to determine how many cubic feet of physical records and/or bytes of electronic records you are requesting to destroy. In our example, the canceled checks are stored in copy paper boxes. Copy paper boxes are estimated to be 1 cubic foot each, so we have 2 cubic feet of these records.

You can use the following table to estimate how many cubic feet of paper records you have. For electronic records, you can view the size of files by right clicking the file and selecting “properties.”
| Paper Records | List how many cubic feet are being destroyed for each record type |
| 1 Box of Copy Paper | 1 Cubic Foot |
| 1 Banker’s Box | 2 Cubic Feet |
| 1 Legal-Sized File Drawer | 2 Cubic Feet |
| Fifty 100 Foot 35mm Microfilm | 1 Cubic Foot |
| 3×5 Cards, Ten 12″ Rows | 1 Cubic Foot |
| 3 Large Bound Volumes | 1.5 Cubic Feet |
Continue to fill out the second page with all of the records you are requesting to destroy. The second page should be filled out one row at a time. You may only have one or two rows to fill out, or you may be doing a record room clean out and will need more space! You can electronically duplicate the second page if needed. If you are manually filling out the form you can print more copies of the second page.
After we have completed filling out page two, we return to page one to fill in section two. This section includes total amounts of records to be destroyed and the signature of the authorizing official.
Add up all the cubic feet from the second page(s) and put the total in the “Total Cubic feet of obsolete paper records destroyed?” field. We have 14 cubic feet of paper records to be destroyed, and 13000 bytes of electronic records. (113KB translated to bytes)

We’ve completed filling out a Local Government Records Destruction Notice and now must have an authorizing official sign it! The ADAH cannot process an unsigned destruction notice. The form may be signed electronically or printed and signed. There are three fields in this section-please fill out all three. The fields include signature, printed name, and title of the authorizing official. Schools must have the district superintendent sign the destruction notice.

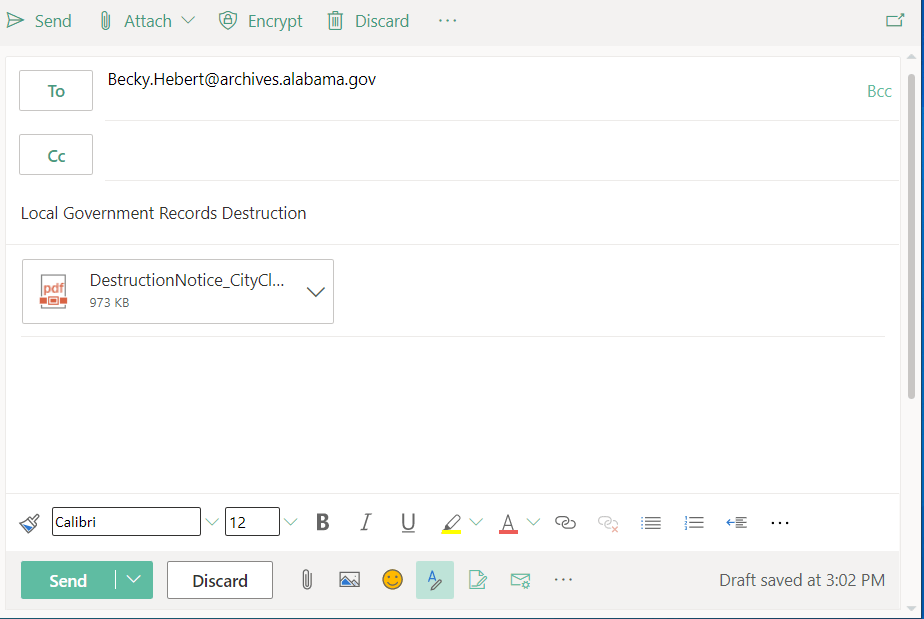
The final step is to submit the completed Local Government Records Destructing Notice via email. Send your notice as an attachment to becky.hebert@archives.alabama.gov. The subject line should be something like “Local Government Records Destruction Notice” to allow the ADAH staff to easily distinguish the content of the email.
REMEMBER: you cannot destroy any records until you receive your letter of eligibility! Make sure to submit destruction notices early if you have scheduled a shredder truck or burn day. Notices that have been filled out correctly will be returned with a letter of eligibility within two weeks of receipt. Destruction notices with errors require follow up and will take longer to process.
The Records Management Section at the ADAH is always available to offer assistance and answer any questions you may have as you fill out your local destruction notice. Don’t hesitate to contact us.
ADAH Records Management Archivist, Hannah Marshall Bawden wrote this blog.
